

This will be our second to the last project this November. We will be making Halloween Hanging Decorations which is very appropriate to do with your kids especially this upcoming Halloween. To start with, we need Art Papers (green, orange and black), card board, crepe paper (any color), bond paper, Any circle object (will serve as your pattern), electrical tape if any (you can also use the ordinary tape, glue, scissors, pentel pen, pencil, and thread.

Using any circular object, Draw a circle on the card board.
 Frankenstein Head
Cut it!

Do the same process on the green art paper.

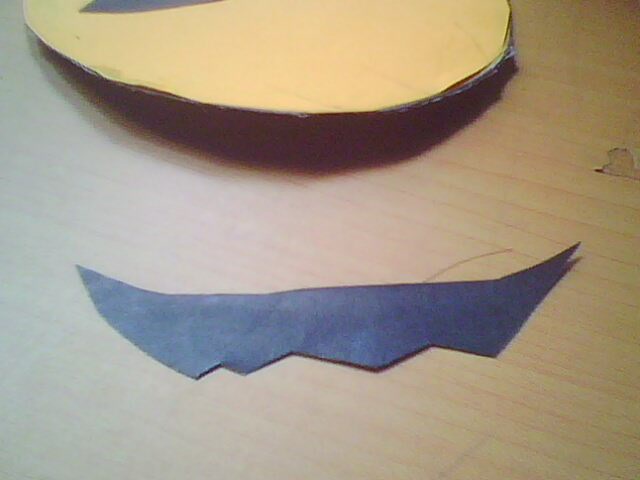
Glue the art paper on the card board.

Cut a hair like figure from the black colored paper.


Glue it on the upper part of the art paper. This will serve as the hair of our Frankenstein.

Cut 2 semi circle shapes from the bond paper (will serve as eyes) and 2 small rectangular shapes from the black colored paper( will serve as eyebrows).


Glue them on their proper location.

Add more details including the pupils and the mouth.

Okay we're done with the head.

Now cut the crepe paper into strips

Tape it on the back of the head.

Flip it up and here's what you get!

Tape the thread at the back. Make it at least 8- 10 inches long.
Pumpkin Head

Do the same procedure as what we did on the Frankenstein head.

Cut a triangular eye-like shape from the black colored paper.


Make a Scary mouth like this.

Place them appropriately on the pumpkin head.

Add some details like the pupils to make the pumpkin more alive.

Cut a leaf-like shape from the green art paper.

Add more details to our pumpkin.

Do the same step as what we did on the Frankie head.
Vampire Bat 
Do the same step on the card board and on the black art paper.

Cut a pair bat wings like this from the black colored paper.

Add a pair of White oblong shaped eye.

Cut a Fang-like shape from the white bond paper.

Paste them on their proper location and add some details like the pupil. (smaller oblong)

Add a pair of eyelids (semi-oblong shape)

Do the same step on the crepe paper and on the thread.
Tadah! Hang it anywhere you like! Hope you enjoy our today's art project! Have a great day and happy blogging!


 Cut a pea-like shape from a black colored paper. This will serve as the body and the head of our spider


